Modify Ready Time
How to configure settings for dine-in services.
General Settings:
- From the dashboard, click the Settings button on the left-hand side of the screen.
- Under the Services tab, click Dine-Ins.
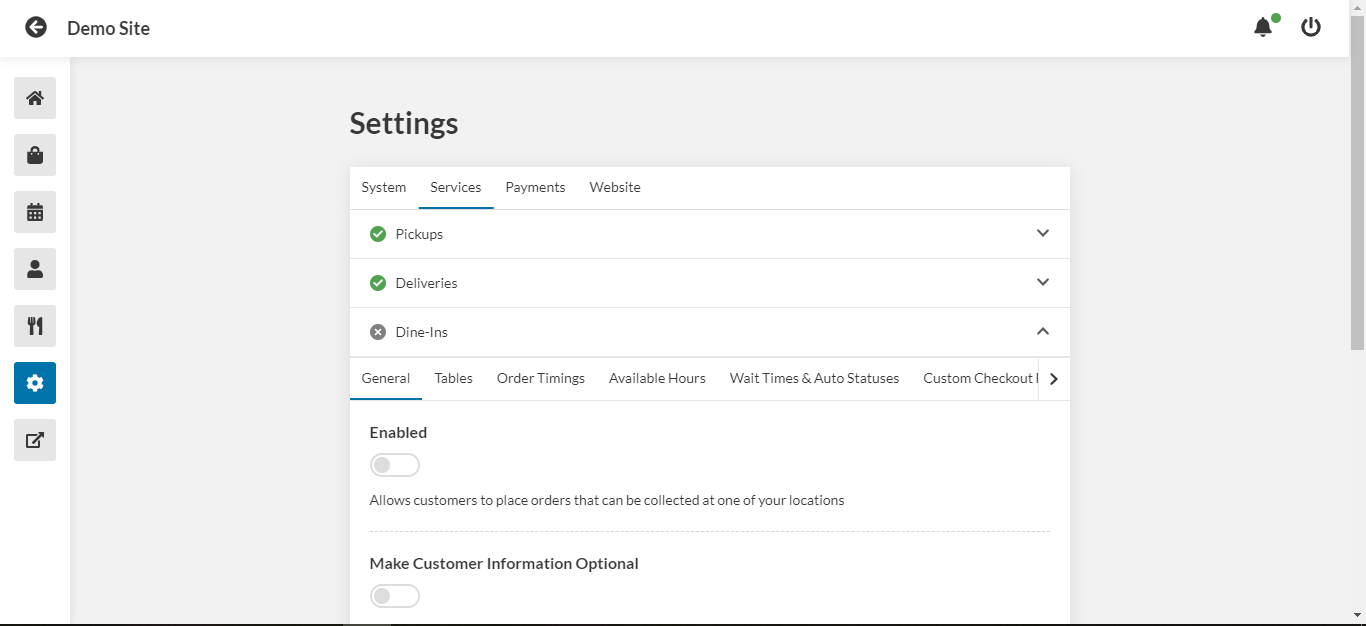
- Under the general tab, use the toggle to enable dine-in orders.
- Use the toggle to require customers to enter in their personal information for dine-in orders. IMPORTANT: Some payment methods might not work if customer information is not provided. Customers will be prompted of what info is required to proceed with their chosen payment method.
- Enter any notes you would like customers to see when making dine-in orders.
- Click Save.
How to add a table:
- Under Dine-Ins, click the Tables tab.
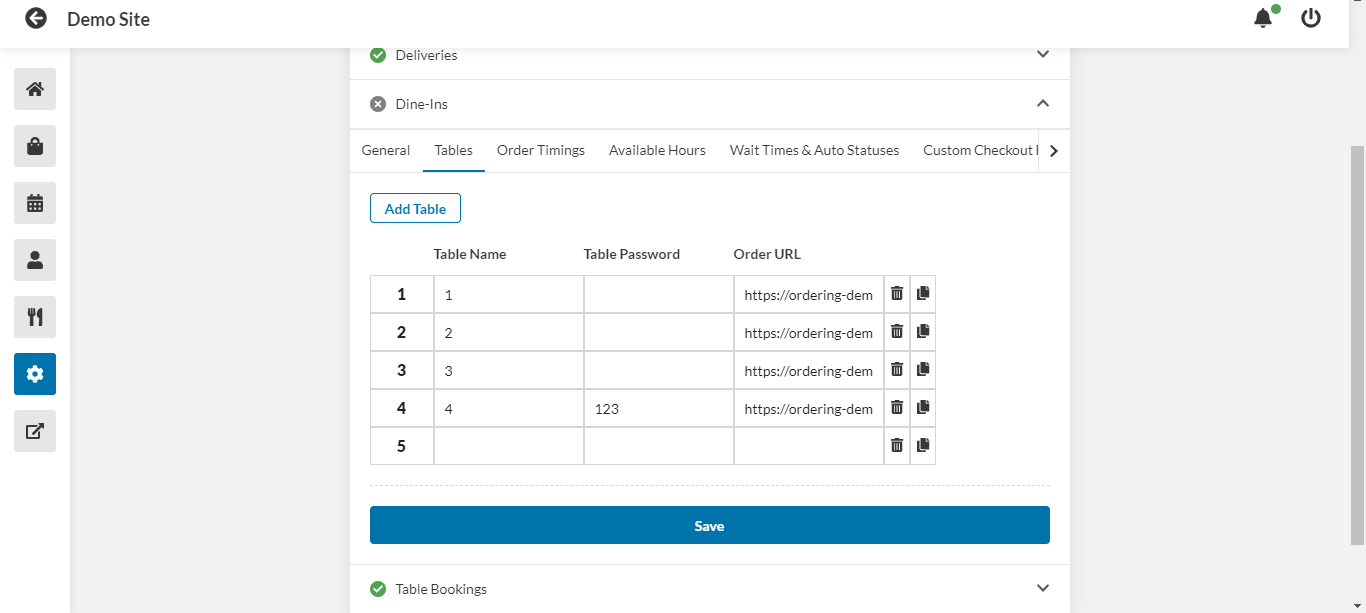
- Click Add Table.
- Enter the table name.
- Enter the table password.
- Enter the order URL.
- Click Save.
Order timing settings:
- Under Dine-Ins, click the Order Timings tab.
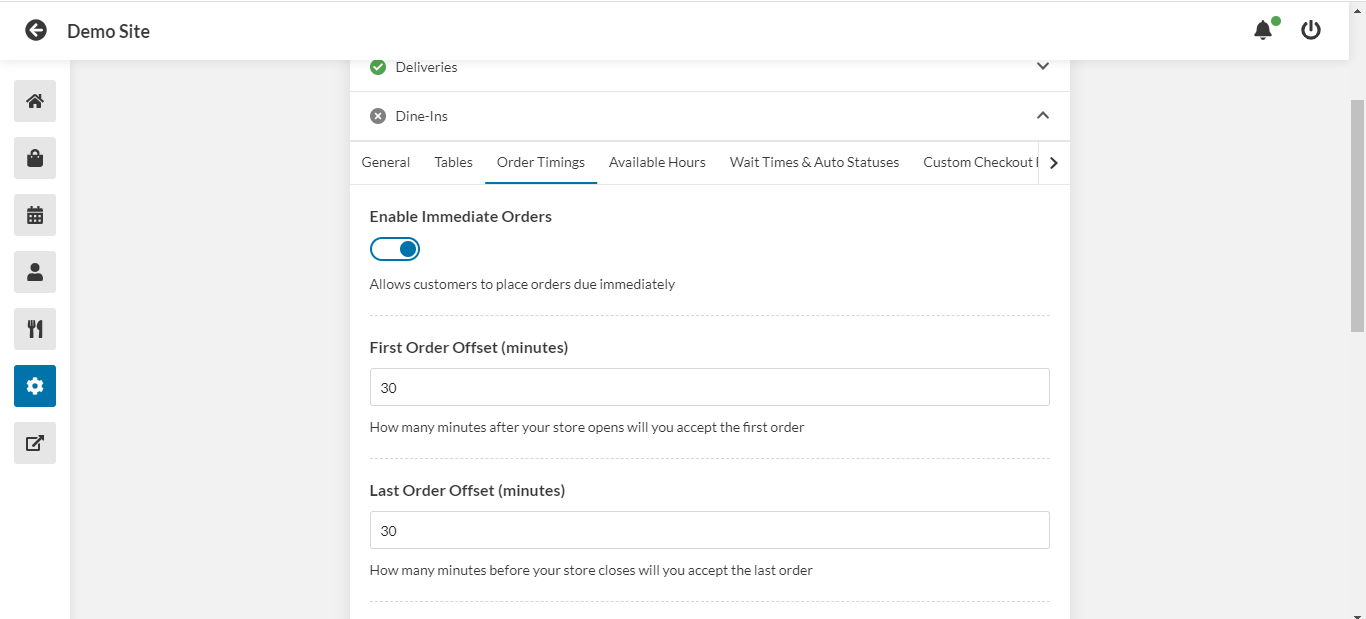
- Use the toggle to enable immediate orders.
- Enter how long after your store opens you will begin accepting orders.
- Enter how long before your store closes you will stop accepting orders.
- Use the toggle to allow customers to place orders for a later date and time.
- Enter the maximum number of days ahead that a customer can place an order.
- Enter the time interval between available order slots.
- Enter the minimum delay between the time the order is placed and the order time requested by the customer for a delayed order.
- Click Save.
Wait time settings:
- Under Dine-Ins, click the Wait Times & Auto Statuses tab.
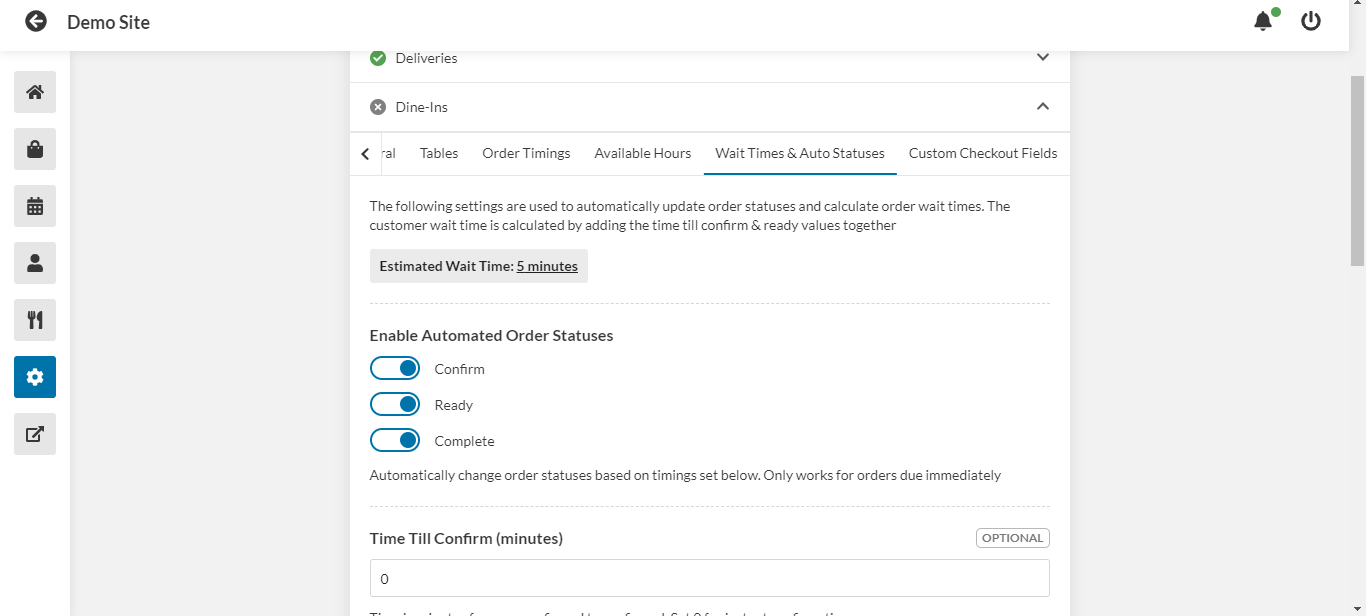
- Use the toggles to enable automatic status updates to be sent based on elapsed time since the order was placed.
- Enter the amount of time to elapse between an order being placed and the confirm status update.
- Enter the amount of time to elapse between the confirm status update and the ready status update.
- Enter the amount of time to elapse between the ready status update and the complete status update.
- For busy times, you can choose to add a certain amount of wait time for each number of outstanding orders. Enter the number of orders to add time for, and then enter how much time you wish to add. For example, to add ten minutes of wait time for each five outstanding orders, enter 5, and then 10.
- Click Save.
Adding custom checkout fields:
You can get extra information from your customer at checkout using custom fields.
- Under Dine-Ins, click the Custom Checkout Fields tab.
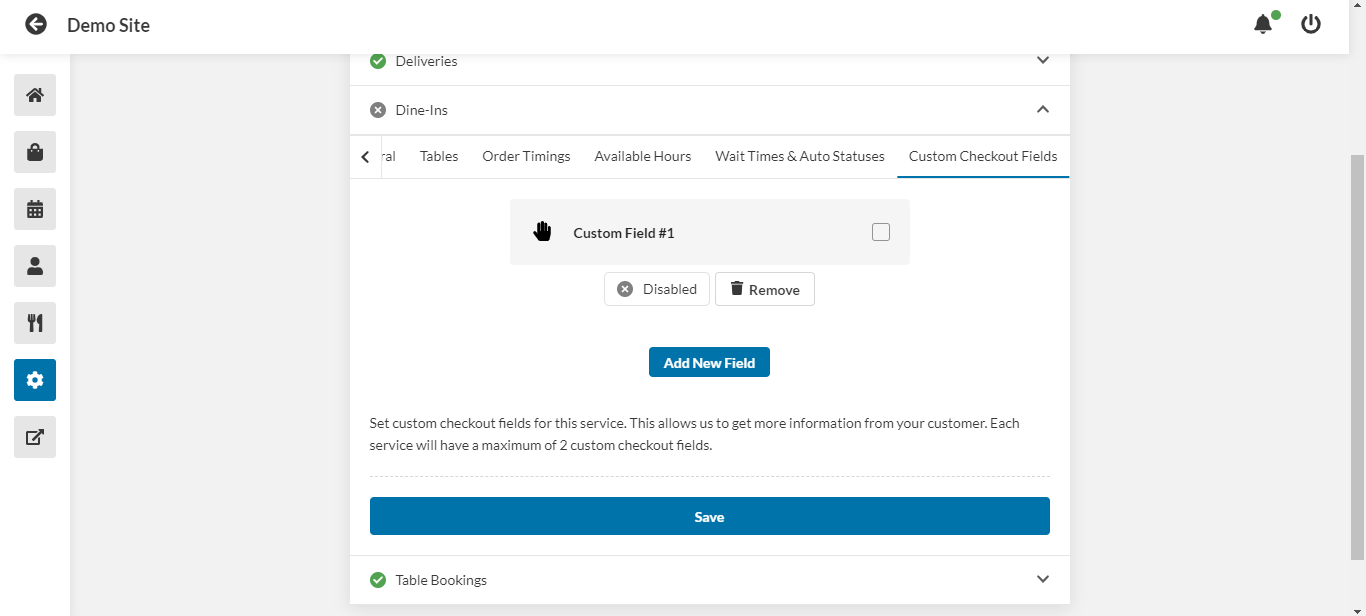
- Click Add New Field.
- In the window that pops up, use the toggle to enable this field.
- Choose the icon that will accompany this field.
- Enter the name of this field.
- Enter a description for this field.
- Choose the type of field.
- Use the toggle to require this field.
- Click Add.
- Click Save.